Difference between revisions of "Get Started"
(→STEP 1: Join the community) |
|||
| (24 intermediate revisions by 9 users not shown) | |||
| Line 1: | Line 1: | ||
| − | == | + | ==Introduction== |
| − | |||
| − | + | Welcome to the SatNOGS community! Here you can find all the info needed to get you started. If you can't wait then why not head over to the [[Omnidirectional_Station_How_To|Quick Start]] page where you find all the information need to get a fixed antenna ground station. | |
| − | |||
| − | + | SatNOGS is a Hackaday Prize winning global project that consists of a network of ground stations that are used to receive voice, CW and data from satellites. As a user you can either build your own ground station and connect to the network or just simply use the existing ground stations to take what you need from the obersvation. | |
| − | + | ||
| − | ! | + | A [[Ground_Stations|ground station]] could be a simple fixed antenna with a Raspberry Pi through to a complex multi antenna steerable ground station running a much larger server. If you're new to this then the [https://community.libre.space/ community] can support and help. |
| − | ! | + | |
| − | ! | + | The basic steps are below, beneath this is more detail on the individual aspects |
| − | + | ||
| − | + | ==Who are you?== | |
| − | + | ||
| − | |- | + | *'''Radio Amateur''': Most members of SatNOGS community are radio amateur operators licensed in may different countries around the world. |
| − | | SatNOGS Network | + | *'''Space enthusiast''': You love space and space data? SatNOGS is just the project for you! There are many learning opportunities around our community, and you can start easily with accessible projects, while you gradually become a space expert! |
| − | + | *'''Satellite operator''': You have your own satellite project? That's awesome! Many SatNOGS ground stations are built by satellite operators to gain extended access on their satellite telemetry and use the stations for telecommand and control. | |
| − | + | ||
| − | | | + | ==STEP 1: Join the community== |
| − | + | [[File:Satnogs-forum-cap.png|800px|SatNOGS Forum Screen capture]] | |
| − | + | ||
| − | + | First things first: make sure to get connected with fellow SatNOG-ers! | |
| − | + | ||
| − | + | *Join the [https://community.libre.space community forums] and [https://community.libre.space/t/new-users-welcome/29 announce yourself]. | |
| − | + | *Follow us on our [https://libre.space/category/updates/ Blog], via [https://twitter.com/satnogs Twitter] or [https://www.facebook.com/satnogs/ Facebook]. | |
| − | + | *Join our live discussions over at IRC #satnogs on the Libera Chat network, or via [https://riot.im/app/#/room/#satnogs:matrix.org the Matrix #satnogs room]. | |
| − | + | ||
| − | | | + | ==STEP 2: Choose and deploy your ground station== |
| − | | | + | |
| − | | | + | Learn about the different options for [[Build|ground stations and software]], and create your station. This choice will determine what type of ground station you have. The reference design of a Raspberry Pi, an RTL-SDR broadband SDR receiver and single antenna is deliberatly straightforward. However, the network is not limited to simple set ups. More complex multi antenna steerable ground stations are common but will need a greater investment in time and resources. They do offer superior performance though. |
| − | + | ||
| − | + | ==STEP 3: Create an account on Network== | |
| − | + | [[File:Satnogs-network-cap.png|800px|SatNOGS Network Screen capture]] | |
| − | + | ||
| − | + | SatNOGS runs a network instance at [https://network.satnogs.org/ https://network.satnogs.org]. It's used to operate various ground stations around the world, but it's also the right place for you to test your ground station. [https://network.satnogs.org/login/auth0 Sign up for an account]. Once you've verified your email address, log in and create a ground station entry and an API key. (Save the API key -- you'll need that when you install the SatNOGS client. | |
| − | + | ||
| − | + | (And if you notice any bugs along the way -- [https://gitlab.com/librespacefoundation/satnogs/satnogs-network/issues please let us know]!) | |
| + | |||
| + | ==STEP 4: Test your setup== | ||
| + | |||
| + | In this step, you will install the SatNOGS client (if you haven't already), and ensure that it can connect to the Network. Once that's done, you can [[Operation|schedule your first observation]]. | ||
| + | |||
| + | ==STEP 5: Move your station out of testing== | ||
| + | |||
| + | Once you feel confident with your observations, post your successful observations to [https://community.libre.space/c/observations the community]. When you feel ready and feedback from the community is positive, edit your station in Network and remove the "Testing" flag from it! Now continue scheduling observations! | ||
| + | |||
| + | ==STEP +: Consider wider contributions== | ||
| + | |||
| + | There are many ways to contribute to the SatNOGS project: | ||
| + | |||
| + | *[[Software contribution|Contributing to the software that runs SatNOGS]] | ||
| + | *[[Provide documentation|Improving the documentation for the project]] | ||
| + | *[[Satnogs DB|Improving the SatNOGS database]] | ||
| + | |||
| + | ==See also== | ||
| + | |||
| + | *[[Introduction]] to SatNOGS. | ||
| + | |||
| + | [[Category:Build]] | ||
| + | [[Category:Community]] | ||
Latest revision as of 15:49, 15 June 2021
Contents
Introduction
Welcome to the SatNOGS community! Here you can find all the info needed to get you started. If you can't wait then why not head over to the Quick Start page where you find all the information need to get a fixed antenna ground station.
SatNOGS is a Hackaday Prize winning global project that consists of a network of ground stations that are used to receive voice, CW and data from satellites. As a user you can either build your own ground station and connect to the network or just simply use the existing ground stations to take what you need from the obersvation.
A ground station could be a simple fixed antenna with a Raspberry Pi through to a complex multi antenna steerable ground station running a much larger server. If you're new to this then the community can support and help.
The basic steps are below, beneath this is more detail on the individual aspects
Who are you?
- Radio Amateur: Most members of SatNOGS community are radio amateur operators licensed in may different countries around the world.
- Space enthusiast: You love space and space data? SatNOGS is just the project for you! There are many learning opportunities around our community, and you can start easily with accessible projects, while you gradually become a space expert!
- Satellite operator: You have your own satellite project? That's awesome! Many SatNOGS ground stations are built by satellite operators to gain extended access on their satellite telemetry and use the stations for telecommand and control.
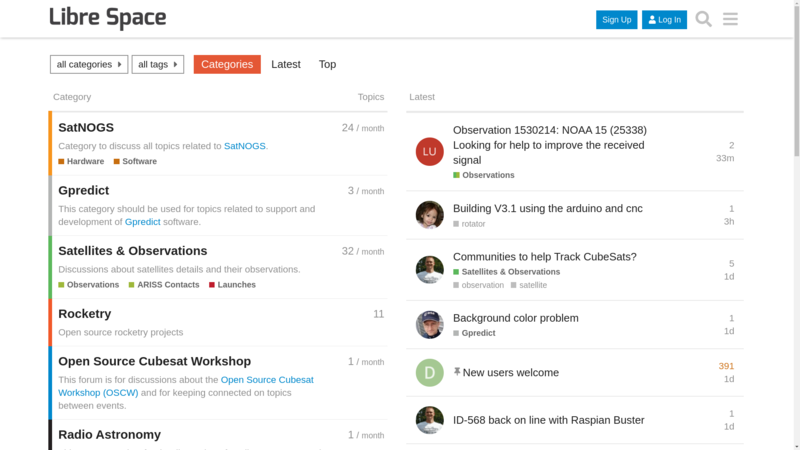
STEP 1: Join the community
First things first: make sure to get connected with fellow SatNOG-ers!
- Join the community forums and announce yourself.
- Follow us on our Blog, via Twitter or Facebook.
- Join our live discussions over at IRC #satnogs on the Libera Chat network, or via the Matrix #satnogs room.
STEP 2: Choose and deploy your ground station
Learn about the different options for ground stations and software, and create your station. This choice will determine what type of ground station you have. The reference design of a Raspberry Pi, an RTL-SDR broadband SDR receiver and single antenna is deliberatly straightforward. However, the network is not limited to simple set ups. More complex multi antenna steerable ground stations are common but will need a greater investment in time and resources. They do offer superior performance though.
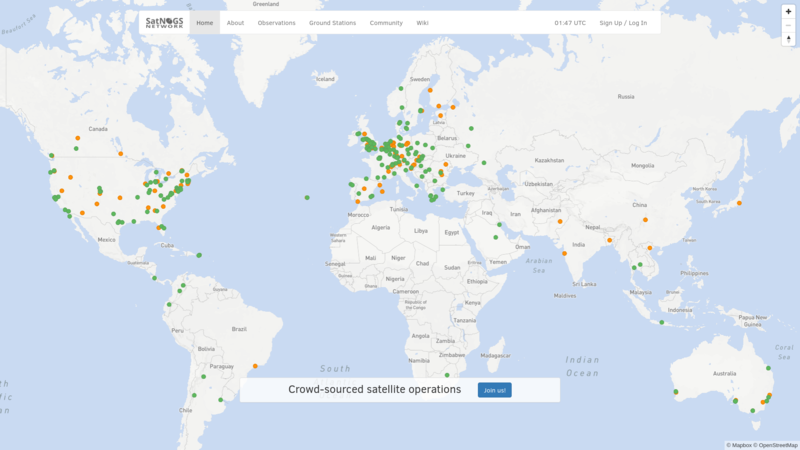
STEP 3: Create an account on Network
SatNOGS runs a network instance at https://network.satnogs.org. It's used to operate various ground stations around the world, but it's also the right place for you to test your ground station. Sign up for an account. Once you've verified your email address, log in and create a ground station entry and an API key. (Save the API key -- you'll need that when you install the SatNOGS client.
(And if you notice any bugs along the way -- please let us know!)
STEP 4: Test your setup
In this step, you will install the SatNOGS client (if you haven't already), and ensure that it can connect to the Network. Once that's done, you can schedule your first observation.
STEP 5: Move your station out of testing
Once you feel confident with your observations, post your successful observations to the community. When you feel ready and feedback from the community is positive, edit your station in Network and remove the "Testing" flag from it! Now continue scheduling observations!
STEP +: Consider wider contributions
There are many ways to contribute to the SatNOGS project:
- Contributing to the software that runs SatNOGS
- Improving the documentation for the project
- Improving the SatNOGS database
See also
- Introduction to SatNOGS.

