Difference between revisions of "Omnidirectional Station How To"
m (Added screenshot of Satnogs client) (Tag: Visual edit) |
m (added link to SPF5189LNA wiki page) (Tag: Visual edit) |
||
| Line 143: | Line 143: | ||
* [https://en.wikipedia.org/wiki/Noise_temperature System noise from wikipedia], pretty high-level | * [https://en.wikipedia.org/wiki/Noise_temperature System noise from wikipedia], pretty high-level | ||
* [https://www.rtl-sdr.com/tutorial-on-properly-positioning-a-preamp-lna-in-a-radio-system/ Where to put an LNA], from rtl-sdr.com | * [https://www.rtl-sdr.com/tutorial-on-properly-positioning-a-preamp-lna-in-a-radio-system/ Where to put an LNA], from rtl-sdr.com | ||
| + | * [[SPF1589 LNA measurements|SPF5189 LNA measurements]] | ||
=== Antenna === | === Antenna === | ||
Revision as of 13:44, 13 April 2019

This How-To is written to get you quickly receiving satellite data with an Omnidirectional antenna (an antenna that does not move).
Contents
Prerequisites/Background
I'm assuming that you are a bit familiar with amateur radio, or linux in general, or you already have a Raspberry Pi.
Expectation Management
First off, I'd like to set some expectations around a SatNOGs station with an omnidirectional antenna. Yes, you will be able to hear satellites, Morse code beacons, maybe even some voice contacts on a FM transponder. But for CubeSats with 1 watt transmitters at 9600 baud, it's going to be really difficult to actually decode any data with an omni antenna. You'll definitely see squiggly lines on the waterfall plot, but demodulating the signal and extracting satellite telemetry is going to be pretty difficult.
The only way to get more signal is a better antenna. And a better antenna with more gain is going to be more directional, which means you will need a way to point that antenna at the satellite, and this How-To just got a lot more complicated. So we're not going there.
A better preamp helps a bit, see the LNA section below.
Hardware Required
This is a list of the hardware for indoor/testing purposes:
- Raspberry Pi
- Power supply + cable (see note below)
- Up to 16 GB Micro SD card
- Ethernet cable
- RTL SDR Blog v3 dongle
- Various short lengths of coax
- Preamp/LNA - Or not if your coax is short, see LNA section below
- Omnidirectional antenna - just a dual mag-mount on a cookie sheet will work OK for stronger satellites
Setting up the Raspberry Pi
I chose the Raspberry Pi 3 Model B for my station.
Downloading/Writing the SD image
The SatNOGs team has done a great job creating a Raspbian image with all the required software. Simply navigate over to the latest tag on Gitlab, and click on the "Zipped image" link under the latest tag. It's about 650 MBytes.
For linux:
- Unzip the downloaded file: unzip image_2018-08-03-Raspbian-SatNOGS-lite.zip
- Figure out which device is the SD card. SD cards are usually start with mmcblk. sudo lsblk
- Write the image. This will take a while. Make sure you don't overwrite your host OS: sudo dd if=2018-08-03-Raspbian-SatNOGS-lite.img of=/dev/mmcblk0
Power notes
Thinking I could save a few bucks, I used a no-name generic 2.4 amp "tablet" USB power supply I got as a freebie, and a micro-USB cable I use for charging my phone. What a mistake! The Micro-USB cable wire gauge was too small, so there was too much voltage drop on the cable, so the Raspberry Pi reported power problems every time it was doing anything.
Power problems are indicated by either a lightning bolt in the upper right of the monitor, or the red power LED flashes on the board itself. If The Raspberry Pi processor itself is pretty forgiving of power droops because it runs at 3.3 volts. But the 5v USB ports are directly tied to input power, so undervoltage conditions will cause problems for USB devices, such as the RTL SDR dongle.
Software Configuration
Creating a SatNOGs Network account
There are several different websites to be aware of and sign in to. As of 12/2018, most of our websites use a unified login provided by Auth0, so when you create an account on one of these sites it will work across the others as well:
- Required: Network: for registering your station and adding data to the network.
- Recommended: Forums: for asking questions.
- Optional: Database: Only if you want to add satellites/modes. Not necessary for receiving satellite data.
Registering the station
Log in to your Network account, and click the "+ Add Ground Station" button, or click here Fill out the short form, and your station will be added to the database. For "Antenna", pick something that encompasses the frequency range of your antenna. For wideband reception, use VHF Discone 26-1200 MHz.
The important info you'll need later on is the Station ID number, lat/lon/altitiude. I would also use a Minimum Horizon of 30 degrees or so, this will keep your station from allowing low-elevation passes to be scheduled. Make sure to keep the "Testing" flag checked, as this lets people know that your station isn't quite ready for real use.
Booting and Configuring Raspbian
After you have the image burned onto a Micro-SD card, boot it! I would recommend hooking up a keyboard and HDMI monitor, you can watch the boot process. If it doesn't boot at all, double check that you wrote the SatNOGs Raspbian image correctly.
After a successful boot, log in with username pi and password raspbian:
- Change your password! passwd
- Update and upgrade raspbian strech: sudo apt update then sudo apt upgrade
- You'll probably update a lot of packages and get a new kernel, so reboot after this: sudo reboot
- Run sudo raspi-config to set up the base OS. Tab switches between the options and select.
- 4 Localisation Options: I1 Change Locale: en_US.UTF-8 UTF-8
- 4 Localisation Options: I2 Change Timezone: None of the above: UTC
- 4 Localisation Options: I3 Change Keyboard Layout:
- 7 Advanced Options: A1 Expand Filesystem
This will expand the ~2GB Micro-SD card partition to fill the entire SD card.
The Raspberry Pi needs to reboot to expand the filesystem, so do this now. It might take a while. 'sudo reboot
Disabling WiFi and Bluetooth
To disable WiFi and Bluetooth, edit the /boot/config.txt file, and add the following lines at the bottom:
# Disable WiFi and bluetooth
dtoverlay=pi3-disable-wifi
dtoverlay=pi3-disable-bt
Then reboot again. To make sure that it worked, run ifconfig and make sure that wlan0 isn't listed. I'm not sure how to tell if bluetooth is turned off.
Additional software
I like to install this additional software with sudo apt install bmon ...
- bmon - a graphical network usage analyzer.
- vnstat - keeps track of your bandwidth usage
- vim - the world's best text editor ;)
- irssi - a terminal IRC client, for chatting on the #satnogs IRC channel
If you can't tell by now, I'm always a big fan of rebooting. It certainly doesn't take that long... sudo reboot
Configuring the satnogs-client
Once you have the base Raspbian Strech OS installed, updated, and looking good, you can configure SatNOGs. Plug in your RTL SDR if you haven't already.
First thing to do is update the satnogs-setup program. Run sudo satnogs-setup. This will probably take a while, then Update, which will also take a while. Per usual, after the update I like to reboot the raspberry pi just to make sure everything was updated and is actually running the new code.
Basic Configuration
Then the actual configuration of the station:
- Run sudo satnogs-setup again
- Basic Configuration:
- SATNOGS_API_TOKEN: After logging in to network.satnogs.org, this is in the upper right under "API Key"
- SATNOGS_RX_DEVICE: rtlsdr
- SATNOGS_STATION_ELEV: station elevation in meters
- SATNOGS_STATION_ID: The number of your station. Newer stations are high 200s.
- SATNOGS_STATION_LAT and LON: Latitude and Longitude in decimal degrees
- HAMLIB_UTILS_ROT_ENABLE: no
Then back to the main menu and Apply to save the configuration. Ansible will run, change some stuff, and probably take a while. If you want to quit, just keep pressing back to exit.
Setting the gain
The next step is to set the gain on the RTL SDR. You're looking for a total gain of about 25 dB. If you have a 25dB LNA, perfect, set the RTL SDR gain at zero. Otherwise, do the math. There are only a few gain options that the RTL SDR supports. The easiest way to see what the options are is to run the rtl_test command. Ctrl-C immediatly to stop:
pi@raspberrypi:~ $ rtl_test
Found 1 device(s):
  0:  Realtek, RTL2838UHIDIR, SN: 00000001

Using device 0: Generic RTL2832U OEM
Found Rafael Micro R820T tuner
Supported gain values (29): 0.0 0.9 1.4 2.7 3.7 7.7 8.7 12.5 14.4 15.7 16.6 19.7 20.7 22.9 25.4 28.0 29.7 32.8 33.8 36.4 37.2 38.6 40.2 42.1 43.4 43.9 44.5 48.0 49.6
[R82XX] PLL not locked!
Sampling at 2048000 S/s.

Info: This tool will continuously read from the device, and report if
samples get lost. If you observe no further output, everything is fine.

Reading samples in async mode...
^CSignal caught, exiting!

User cancel, exiting...
Samples per million lost (minimum): 0
pi@raspberrypi:~ $
Since I have a LNA with a gain of slightly under 20dB, I picked 8.7dB of gain for the RTL SDR. This value goes into the SATNOGS_RF_GAIN setting under Advanced settings in satnogs-setup.
Checking the setup
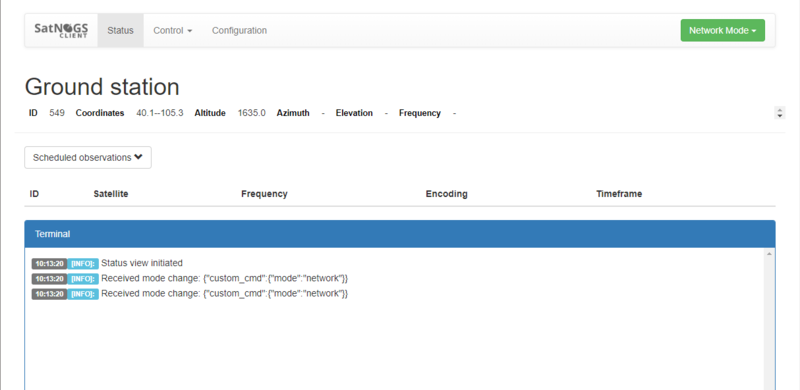
SatNOGs come with a built-in web server on port 5000. So just surf over to IP address of your Raspberry Pi on port 5000, and you should see a screen similar to this:
Hardware Configuration
Basic hardware configuration is Antenna > Short coax > LNA > Coax > RTL SDR.
LNA
The way to measure the performance of an antenna is using a figure of merit called the Antenna gain-to-noise-temperature (G/T). It's a positive unitless number, higher the better.
G/T is comprised of antenna gain (in dB) on the top, and the system noise temperature (in Kelvins) on the bottom. There's a lot of somewhat-hard math involved, but here's the bottom line: to make your system perform better, you either need to increase the antenna gain or decrease the system noise temp. Wikipedia
Increasing the antenna gain is difficult, only because we decided on an omnidirectional antenna as the basis for this How-To. Omnidirectional antennas top out at maybe 7 dB gain or so, and that's just from pushing the radiation pattern up to the sky away from the ground. Any more gain than that and it's not an omni antenna; it's got a direction that the antenna needs to be pointed in. And we want to stay away from pointing antennas for now.
Reducing the system temperature is the the way forward then. The RTL-SDR dongle has a noise figure of 6dB or so, depending on frequency, which is pretty horrible. But it turns out that the system noise temperature is largely determined by the first device in the receive chain. Since we can't change the antenna, adding a low-noise amplifier helps quite a bit. See this youtube video from Adam 9A4QV on how a LNA helps. (Also check out his other videos about the RTL SDR dongle, and SDR in general)
More info on noise and preamps:
- System noise from wikipedia, pretty high-level
- Where to put an LNA, from rtl-sdr.com
- SPF5189 LNA measurements
Antenna
For testing on the bench, pretty much any antenna will do. Or if you have a whip antenna already outside for repeater work, use that. As I mentioned before, I've successfully used a mag-mount antenna stuck to a cookie sheet, sitting inside my living room window.
Also, remember that some new low emissivity double-pane windows use metal films to keep heat inside. Unfortunately, this also attenuates pretty much all RF signals, see this article for more background.
Testing the station
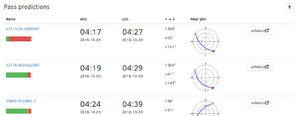
Now that you have the hardware and software up and running, go ahead and schedule some passes. Navigate to your station page, and click on the Schedule button on the right side of some promising passes. The green and red bars beneath the satellite name is a quick visual indication of the number of Good and Bad passes on the network. Unfortunately, this data is not time-stamped at all, so a satellite that had a lot of Good observations a long time ago, but recently died, would still show as Green.
Rating an Observation
After each observatios, you should rate it. More information here, but the bottom line is rate the observation:
- Good if the satellite is seen in the waterfall at all. The satellite will be a straight line in the middle of the waterfall plot.
- Bad if the satellite is not seen.
- Failed if there was a problem with the station, such as a mis-configuration, or if the waterfall is missing or a solid color.
Calibrating frequency offset (PPM)
This is not super important for a new station.
Next Steps
Now that you've got this station working on the bench, what's next?
For permanent mast-mounted installation, I would recommend adding:
- PoE splitter - Make sure to get one that actually conforms to the 48-volt IEEE 802.3af standard
- POE injector for powering station remotely - Again, get a real 48-volt IEEE 802.3af standard
- Large mast-mounted waterproof box
- Waterproof cord grips, both to keep out the rain but also spiders and critters
- Desiccant to keep the humidity down
- Mastic tape for weatherproofing antenna connectors
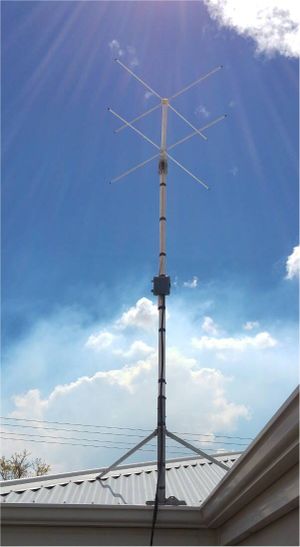
- Better omnidirectional antenna
Building a Box
External links
- IQ3KU Omnidirectional station build write-up.

